Introduction
Covered
This blog post took a long time to write and is fairly lengthy, but even with that length there are several topics I’d like to cover that I was not able to. This blog post covers how to test for correctness and only correctness. It doesn’t say anything about how to test for performance, usability, or generative testing. I’ll cover those in a future post.
Code
You can find all the code for this blog, and all future blogs, on Github at https://github.com/Jazzepi/p3-blog
Terminology
A quick rundown of terms used in this post. There is a lot of variation in the industry on how people talk about testing. This should clarify up front how I categorize tests, and some other general terms used in this post.
- Unit Tests: Involve only one component (a class in Java) and are generally very quick to run (on the order of 100s of milliseconds). In JUnit helps us run unit tests, and verify the results.
- Integration Tests: Involves the composition of multiple subcomponents, but not the entire application stack. Generally interested in exercising the plumbing between those components. Tests that involve exercising your DAOs with a in memory SQL database would be an example. In JUnit is often the test runner for these integration tests, but may or may not need other libraries like rest-assured to provoke a response from the application code.
- End to End Tests (e2e): Involves the entire application stack from an external user’s point of view. Selenium driven website tests, but can also include HTTP requests against a RESTful API which only expects programmatic interactions (no user facing website). In JUnit is often the test runner for these e2e tests, but will almost certainly need other libraries like rest-assured to provoke a response from the application code.
- Test Driven Development (TDD): An iterative development style that encourages you to write your tests first, then write your code to make the tests pass.
WHY: You must write tests to preserve credibility
Testing is an essential part of software development because we make promises to our stakeholders and we want to keep those promises. When you tell your customer that your software will do X, Y, and Z and it fails to do Z, then you’ve broken your promise. When you break your promises you lose credibility. Testing is the only true way to prove that your software does what you promise that it will do.
A simple real world example of this is an airbag in a car. Auto manufacturers make a promise to us as a customer that their cars are safe, and in turn the parts manufacturers for the cars make promises to the car makers that their parts are well engineered. The Takata airbag recall is an example of what happens when a company breaks their promise. Not only is Takata on the hook for millions in liability, but people are dead because they didn’t have sufficient quality controls.
In programming, testing is our version of quality control. If you don’t test, you can’t keep your promises and your credibility, along with the credibility of those who use your product as a component, will be damaged. Finally, see the Therac-25 machine for how bad programming can literally kill.
WHEN: Tests are pure overhead
Below is an example of a mocked up user interface. It’s crude, it’s non-functional, but it was cheap to make, and very little will be lost when it is thrown away. Nothing in the below mock will contribute to the delivery of the final product, it is pure overhead, but (and this is key) it is not very much overhead. This mock probably took a few hours to construct. Building a real website with functioning components could take hundreds of man hours. The trade off of a small amount of time spent on getting your ideas correct up front vs a large redesign later on is why we do things like create mocks even though they’re pure overhead.
Just like our above mock tests are pure overhead. Unfortunately, unlike the above mock tests are intimately coupled to the low level implementation details of code. Yes you are testing the API of a given component, and asserting on the values that it returns, but your tests care about what the internals of the API did. If your API change, OR if implementation changes, your tests will have to also change. Therefore if we could be perfectly certain (and we can’t, at least not yet, but people are working on provable software) that our software worked we would never write tests, because we wouldn’t need them to know that our promises will be kept. This is why tests are pure overhead.
WHEN: Write tests when you’ve narrowed the cone of uncertainty to minimize overhead
This below chart is a cone of uncertainty that shows how at the very beginning of the project it’s difficult to make predictions about how long the entire project will take. There are simply too many unknowns. Will this technology really work at scale? Will the service provider we’re using meet it’s SLAs? How many customers will we really have? Is Pinnegar going to call in sick saying “I really lit and will rodqy” at a crucial time? (I was ill and sent in a bizarre message. I still have no idea what I was trying to type.)
Despite the fact that the chart is about predicting how much time something will take, this applies just as equally to whether or not a piece of written code will change over time. If you’re writing a large application, the first component you write will often be refactored, rewritten, and rethought many times as the application integrates more functionality. But the last component you add will not have as many iterative cycles over it simply because you’re very close to the time you’re going to deliver the product to a stakeholder. Even if you wanted to make radical changes it’s just too late in the process to do so.

That said we want to minimize any overhead in our application development process, and this applies to tests just as well as anything else. Therefore I suggest you write your tests only when you have confidence that your design is not going to change. Anytime you change your design, you often times have to throw out any work you’ve spent on tests, and then you have to write them again.
In summary, when you’re thinking about when you should be writing tests you should do them at the last possible moment so that they deliver value while minimizing overhead.
How to write tests
Cover as much as you can lower in the testing pyramid
The testing pyramid is the ideal distribution of your tests. The area of the section of the pyramid represents how much of your testing should be done using that methodology. So following the pyramid, we should expect to have far viewer Automated GUI Tests (e2e tests) than unit tests.
This is because the more components you test during a test the longer the tests will take to run, and the more unstable they will become. Because of these two reasons try to get as much coverage out of your unit tests as possible. That said don’t be afraid to cover the same functionality in a unit, integration, and e2e tests. Mainly you should strive to write an exhaustive suite of unit tests, and a smaller, less exhaustive suite of tests on the layers above it.

Isolate your code from dependencies
Unit tests are all about isolating one piece of your application and testing it in absentia of anything else. You should be able to run your unit test anywhere, anytime, without any external dependencies (extra Java libraries are fine).
If your class depends on an external service then you should mock it. Use a mocking framework like Mockito, or write a stub of your own.
If your class depends on time, then freeze time for your unit tests. You can achieve this a number of ways.
For Ruby, there’s a great library called Timecop that allows you to freeze time, and move forward and backwards through it.
For Java, if you’re using Jodatime (which I strongly recommend you use over the pre-Java 8 time libraries) you can use their DateTimeUtils class to set the time. Note that if one of your components care about the TimeZone Joda time caches the timezone provided by the Java standard library so you’ll also need to call DateTimeZone.setDefault;
For Java, if you’re using the raw System.currentTimeMillis then I recommend that replace it with a TimeSource service which provides the time to your components. This class should normally call through to the System.currentTimeMillis method, but you will be able to mock out the time this way. Here’s a great example.
For Java, if you’re using a component who’s source you do not control that uses raw System.currentTimeMillis then you need to mock it out using PowerMock and Mockito. This is the least-best option.
Don’t be afraid to get a little wet
DRY or don’t repeat yourself is an great rule of thumb for programming in general. If you repeat something that means you need to change it in multiple places if it has to be altered in the future. This is great for code, like an EmailService, that will be used throughout your application in various places. However, when you’re writing code for a test what you’re most interested in is clarity. This means that you should be willing to sacrifice a little DRYness, and do some copy and paste if that makes the test easier to read.
I generally find that if truly understanding a test requires the reader to look through the implementation of more than two private methods (such as setup()), then I should make the test a little more wet, with the express goal of allowing the reader to focus on a single block of code.
Each test should assert the state of only one conceptual thing, but put as many assertions about that concept as you need
You want to know by looking at a unit test name what component failed and what it was doing when it failed. You get the specific values that were in play at the time of the exception in the stack trace the unit test provides.
In the below case we could write two different tests with the same setup, and two different assertions in each one. This would mean that the first failure would not mask the second one. But I find it cumbersome to repeat the same setup multiple times, and moving it into a method just obfuscates the test, and forces the reader to bounce around between multiple sections of the code.
Instead I recommend writing a test with as many assertions as you need as long as those assertions are about the same conceptual idea. In this case we’re testing to make sure that when a child dies, the parent no longer has them in their list. The operation has to pass both these checks to be correctly performed, so we just include them in the same test instead of repeating the setup across both tests.
package com.pinnegar;

import org.junit.Test;

import static org.assertj.core.api.Assertions.assertThat;

public class PersonTest {

    @Test
    public void should_not_have_child_after_death() {
        Person sicklyChild = new Person("Sickly Child 2");
        Person person = new Person("Mike").addChildren(new Person("Child 1"), sicklyChild, new Person("Child 3"));

        sicklyChild.die();

        assertThat(person.getChildren()).hasSize(2);
        assertThat(sicklyChild.getLivingStatus()).isEqualTo(Person.LIVING_STATUS.DEAD);
    }
}
ACT, ARRANGE, ASSERT
Order your tests as much as possible this way, and group the stanzas with blank lines between them. When reviewing a test you’re not familiar with you generally want to ignore the setup, look at what it’s doing, and then see which assertion failed. This allows you to quickly scan a test without reading all the setup. For reference I first learned about this organizational methodology here.
package com.pinnegar;

import org.junit.Before;
import org.junit.Test;

import static org.assertj.core.api.Assertions.assertThat;

public class CalculatorTest {
    @Test
    public void calculator_can_mix_operations() throws Exception {
        //ARRANGE
        Calculator.SubtractingCalculator subtractingCalculator = calculator.subtract(0);
        Calculator.DividingCalculator dividingCalculator = calculator.divide(-4);

        //ACT
        int subtractingAnswer = subtractingCalculator.from(-500);
        int dividingAnswer = dividingCalculator.by(2);

        //ASSERT
        assertThat(subtractingAnswer).isEqualTo(-500);
        assertThat(dividingAnswer).isEqualTo(-2);
    }
}
Write your test names with underscores
Most programming languages use camelCase for method names. That makes a lot of sense when you often times have to type references to those names frequently in other parts of the code. snake_case require you to frequently hold shift and then awkwardly move away from the letters to type the _ while camelCase allows you to keep your fingers on the letters.
I think that’s a great argument against using snake_case in code that will be referenced often in typing. Unit tests are a special case though, in that the title will be written once and read many, many times. For that reason I recommend using snake_case in the names of your test cases instead of camelCase.
Throw exceptions
Always throw checked exceptions from your tests don’t try to catch and handle them there. This prevents you from littering your code with try-catch statements.
If you’re writing a test case that validates that an exception is thrown, then let JUnit validate that for you as shown below. You can also use AssertJ to validate exceptions nicely with Java 8. If you need powerful assertion checking I definitely recommend using AssertJ’s inline method over JUnit’s expected annotation.
Here’s an example of three different testing methods. One doesn’t declare any exceptions to catch, so doesn’t throw them. The middle declares an exception can be thrown, but the underlying code shouldn’t throw one (we expect it to pass). And finally the last one declares an exception can be thrown, and is expected to be thrown during the test (dividing by 0 is a bad idea).
@Test
public void calculator_should_subtract_both_negative_numbers() {
    assertThat(calculator.subtract(-100).from(-3)).isEqualTo(97);
}

@Test
public void calculator_should_divide_by_negative_numbers() throws Exception {
    assertThat(calculator.divide(10).by(-3)).isEqualTo(-3);
}

@Test(expected = IllegalArgumentException.class)
public void calculator_should_throw_exception() throws Exception {
    assertThat(calculator.divide(-100).by(0)).isEqualTo(97);
}
Test diversity
You should always try to run your tests on a variety of platforms. If you’re writing Javascript unit tests, execute them in different browsers. If you’re running e2e tests in a browser, run them in different browsers. If you’ve got a Java program that is destined to be deployed on Linux and Windows, run ALL your tests on both platforms.
Also take advantage of test runners that allow you to randomize the test runs. This will help uncover hidden dependencies between unit tests that you did not anticipate. Be aware that if you set this option on, it may fail an important build like a CI release build, so you should use discretion on where you enable this feature. If your randomizing test runner supports it, make sure that you use seeded randomness and record the seed so that you can replicate the order of failure easily.
Never mock when you don’t have to
Mocks are complicated things. They require a library to setup, and generally you have to provide all the functionality that a normal object would (Mockito mocks have some special knowledge of Java standard library classes and will do things like return empty lists). Therefore you should avoid using them if you can just use a normal Java class. You should, for example, never mock Java’s List interface. Just use a normal ArrayList. That way you won’t end up mocking the .size() function, which is a complete waste of your time.
Never assert on mocks, or the values they return
Anything a mock returns is fake. It cannot be used to tell you something about the real behavior of your code. Therefore asserting on that value is always incorrect. If you ever see the below kind of code you instantly should know something is wrong.
assertThat(mockService.getValue()).isEqualTo(value);
The one exception to this rule is if you’re using a partial mock (sometimes called a spy) which is where you take a real class, and only mock out some of its methods. This is generally the least-best option you have for mocking, as you can’t guarantee that you captured all the functionality of the stubbed out method that you replaced.
Use obviously fake, but meaningful to the test, values when possible
If you’ve got a method call library that splits text on spaces, the way you would test it is by providing it a set of strings and proving that given that you have string “B C D”, you get string “B”, “C”, and “D” out of it. Since the strings B, C, and D can be anything (without spaces) then it makes a lot more sense to test on the string “first second third” or “1 2 3”. Then you can write an assertion like this where the fake values are helpful in debugging the test since 1, 2, and 3 have an obvious order.
package com.pinnegar;

import org.junit.Test;

import static org.assertj.core.api.Assertions.assertThat;

public class RegexTest {
    @Test
    public void test_space_splitter() {
        assertThat("1 2 3".split(" ")).containsExactly("1", "2", "3");
    }
}
Unit Tests: Only test a single class
Only ever test one class in your unit test methods. This keeps them simple and straight forward. If you have three classes Foo, Bar, and Baz then you should have at least three test classes named FooTest, BarTest, and BazTest. You may have more test classes for one of the components if it covers a lot of different functionality, but then you should seriously reconsider refactoring the class, it probably has too many responsibilities.
e2e Tests: Retry, retry, retry
e2e tests are notorious for failing in intermittent ways: something doesn’t load on the page correctly, a shared service is down, the browser is slow, or the network is saturated. You should retry your e2e tests when they fail, and accept the second pass as a pass for the whole suite. However, you should not discard that information. It’s helpful to know which tests are unreliable, and why failures occurred.
e2e Tests: Stress your tests
Run your e2e tests on a regular basis, but also stress test them. When you’re developers are away, use that downtime to run your CI machine on a long loop over your e2e tests. Keep track of the failures over time. You will be able to identify the test that are adding the most instability to your e2e test suite (probably because they’re written wrong) and fix them. It’ll also help you identify when a stability fix actually works.
e2e Tests: Wait, don’t sleep
When running e2e tests you often have to wait on something to be true. You need to wait for components to be present in a browser, or for the database to update with its changes (especially true if you’re not using an ACID compliant database). You should always wait for these components by detecting their presence, not by using a sleep command that forces the test thread to wait. Sleeps are very, very brittle and should be avoided at all costs. I would even recommend modifying your code base to provide special hidden values for the test suite to trigger on rather than adding in a sleep.
Conclusion
Write your tests you need them. Write them in a manner that will ensure that you keep your promises. Write them in a way that keeps them maintainable, readable, and correct throughout their lifetimes.
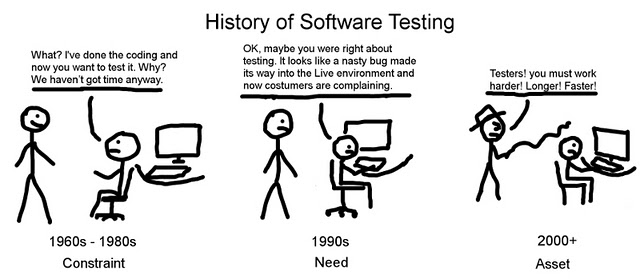
Image from http://ashishqa.blogspot.com/2012/12/history-of-software-testing.html